Installation
Get Olmbox running alongside Contact Form 7 in a few minutes.
Requirements
Olmbox is a companion to Contact Form 7 rather than a replacement, so CF7 must be installed and active. It is declared as a hard dependency, which means WordPress itself will stop you activating Olmbox without it.
| Requirement | Version |
|---|---|
| WordPress | 6.8 or newer |
| PHP | 8.1 or newer |
| Contact Form 7 | Any current version |
You will also need an API key from one of the supported providers. Olmbox does not include or resell AI access — see Configuration.
Install the plugin
Olmbox is on the WordPress.org plugin directory, so the simplest route is straight from your admin.
- Install and activate Contact Form 7 if it is not already active.
- Go to Plugins → Add New, search for Olmbox, then install and activate it.
- Go to Contact → Olmbox in the WordPress admin.
You can also download the zip from the directory and upload it via Plugins → Add New → Upload Plugin, or install from GitHub if you would rather track the source.
On activation the plugin creates one database table for the submission log. Nothing else on your site is modified.
First-run setup
Olmbox stays inert until you both add a key and choose which forms it applies to. There is no default-on behaviour.
- Open Contact → Olmbox → Settings → AI Provider.
- Pick a provider, paste your API key, and click Load Models.
- Choose a model, then use Test Connection to confirm the key works.
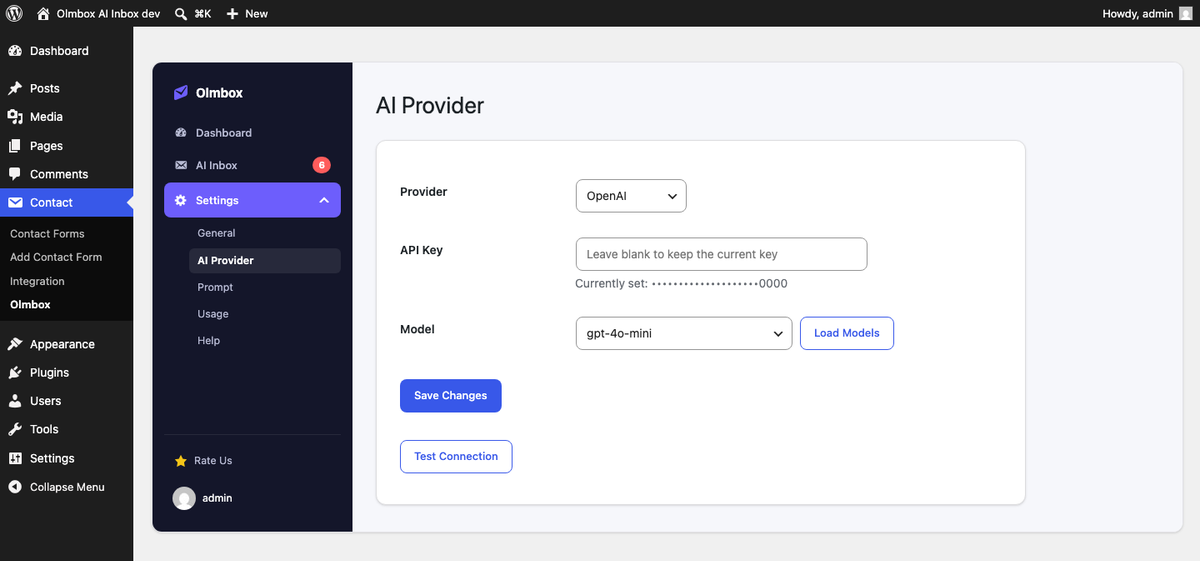
- Switch to the General tab, tick Enable Olmbox, and select the forms that should be analysed.
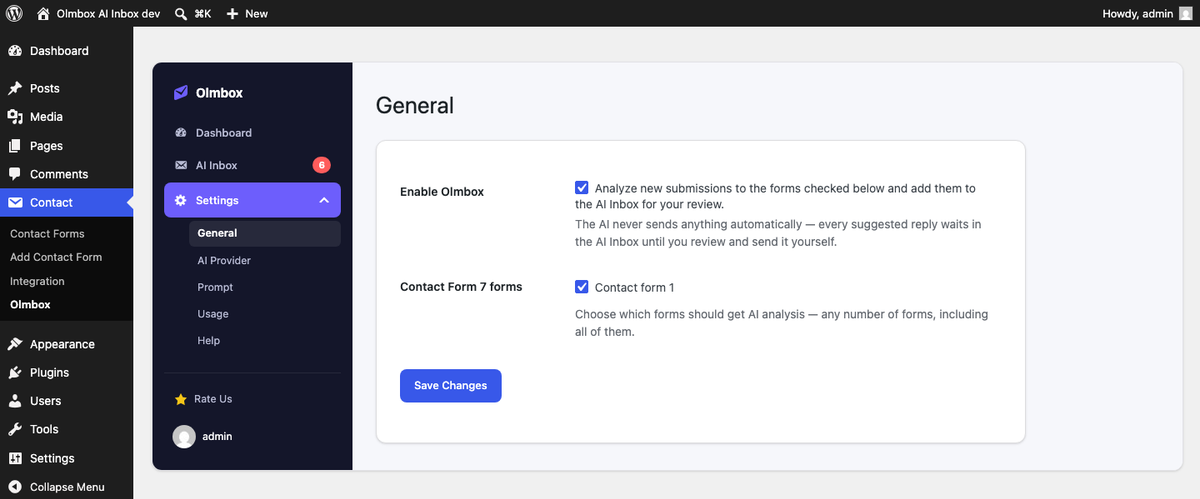
Submissions to any form you have not ticked are ignored entirely — no request is made and no row is logged.
Verifying it works
Submit one of your enabled forms as a visitor would. Within a few seconds a new row should appear under Contact → Olmbox → AI Inbox.
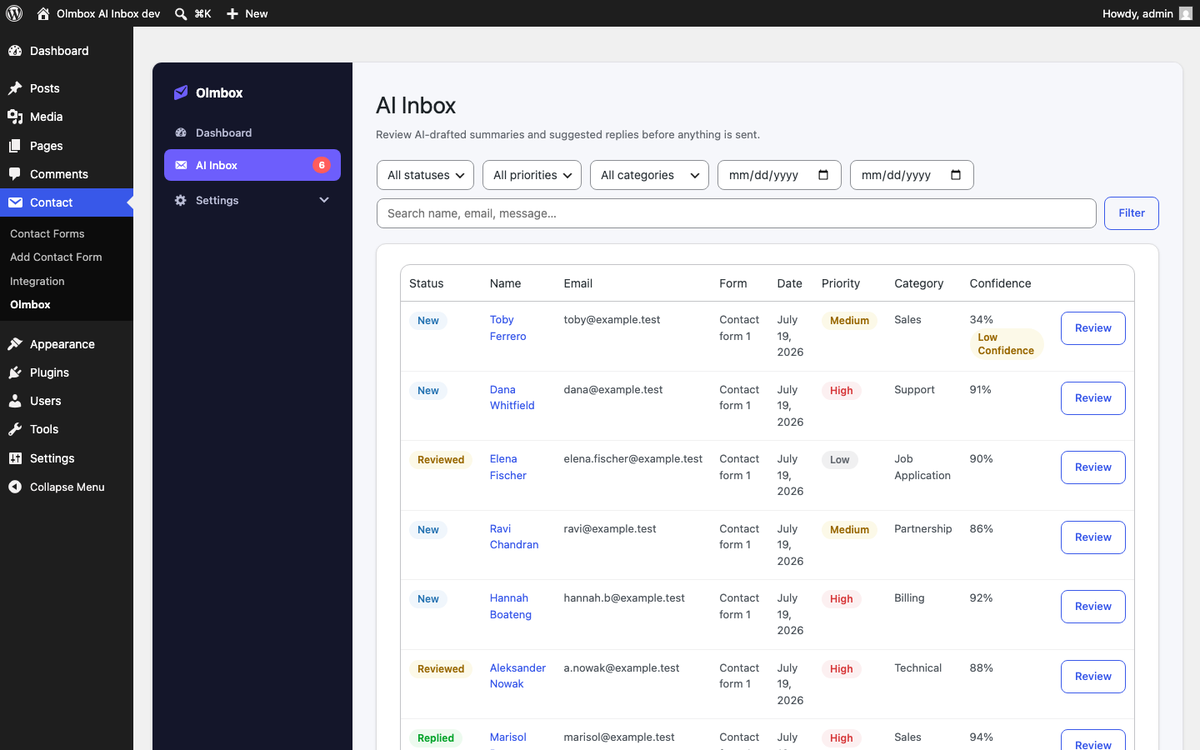
If the row appears but has no analysis, the submission was captured and the AI step failed — the row will say why. That is by design: a provider outage should never cost you the message itself.
Contact Form 7 sends its own notification email before Olmbox runs. If your site cannot send mail at all, CF7 reports a mail failure and Olmbox never sees the submission. Fix mail delivery first if nothing is being logged.